Resolving the Absence of the WordPress Theme Editor
The Theme File Editor in WordPress empowers users to directly modify the code of their chosen theme right from the dashboard. This feature provides users who possess a basic understanding of coding with the ability to extensively tailor the aesthetic and functionality of their website. Generally, you can access the theme editor by going to Appearance, then Theme File Editor. However, there are various circumstances where you might discover that this feature is not accessible.
Step 1: Guide to Activating Your WordPress Theme
Initiating your journey in website design with WordPress can be exhilarating, yet certain initial steps are crucial for a smooth start. A frequent oversight by beginners is the incomplete activation of their chosen WordPress theme. This guide will walk you through the process of fully activating your theme, ensuring you’re on the right track.
Step-by-Step Activation Process
Choosing the Right Theme: Before anything else, it’s essential to select a theme that aligns with your website’s goals. While there are numerous themes available, a highly recommended option is GeneratePress, known for its flexibility and ease of use. Consider your website’s purpose and aesthetic appeal when making your choice.
- Installation and Activation:
- Installation: Once your ideal theme is chosen, the first step is to install it. This is usually a straightforward process where you select ‘Install’ on the theme;
- Activation: A crucial step that is often missed is activating the theme. Installation alone does not make the theme functional on your site. To activate, simply click the ‘Activate’ button post-installation. This will implement the theme on your live site.
- Verifying Theme Activation:
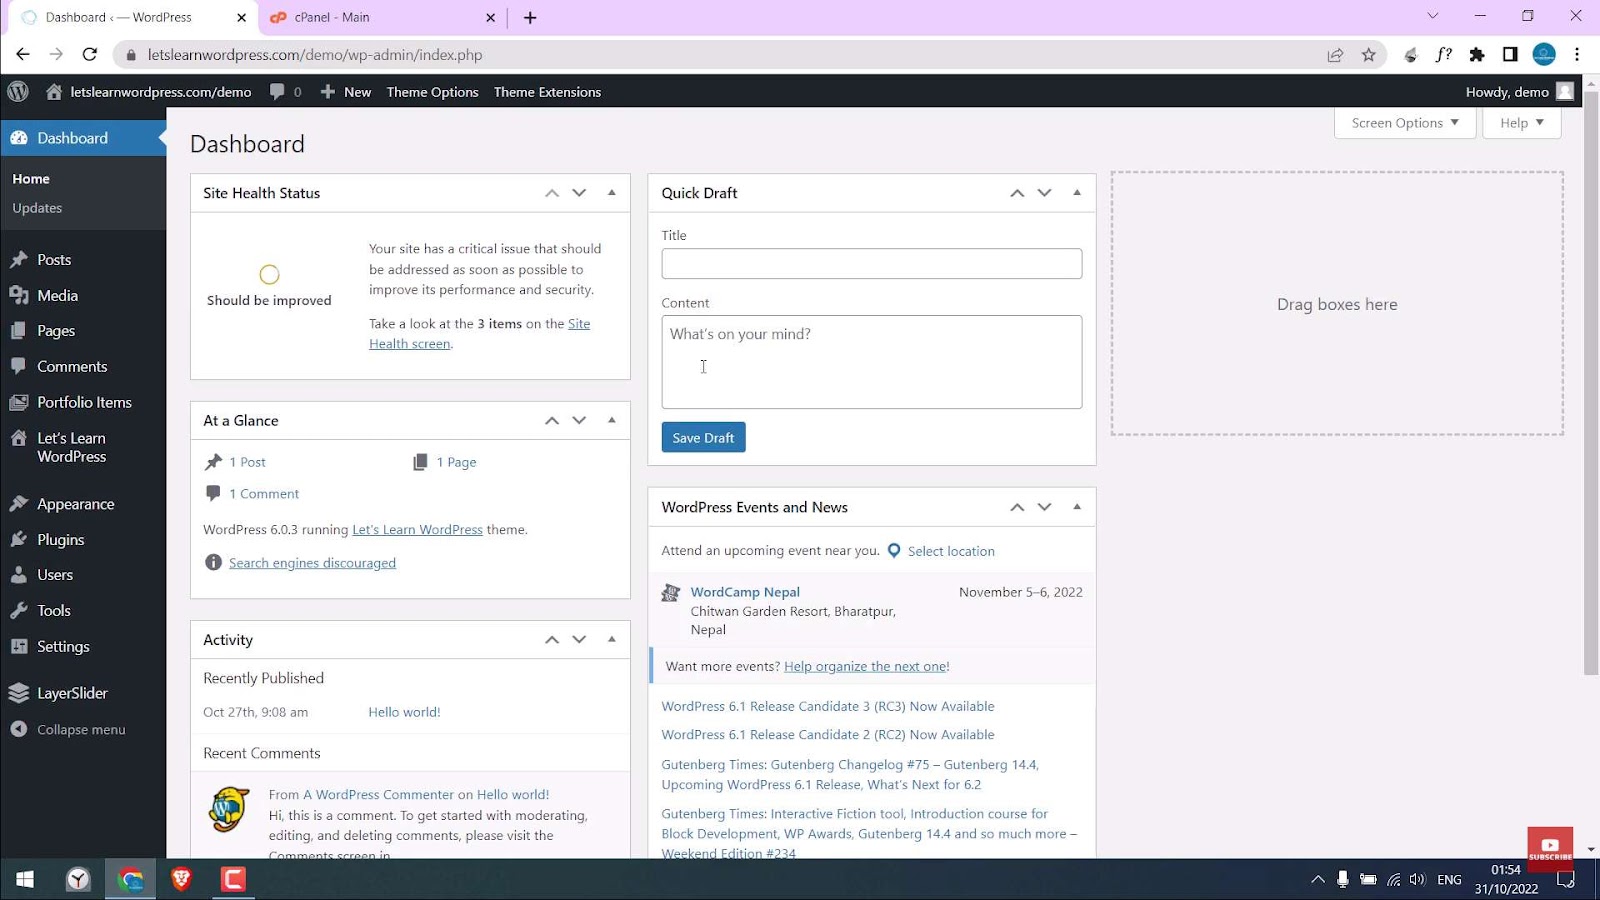
- Theme Editor Accessibility: Post-activation, verify if the theme is fully operational by checking the theme editor. Initially, this option is disabled and will only become available after successful activation;
- Appearance Menu: Navigate to the ‘Appearance’ submenu on your dashboard. If the activation was successful, ‘Theme File Editor’ should now be visible as an option.
Step 2: Evaluating Your Security Plugin Configurations
Website administrators, both experienced and novice, often encounter challenges related to their chosen security plugins. These plugins, such as SiteGround Security and iThemes Security, play a pivotal role in safeguarding websites from potential threats. However, their intricate settings can sometimes inadvertently hinder certain functionalities, such as disabling the theme editor. While this might initially appear as a drawback, it’s essential to recognize the significant purpose this feature serves, particularly for websites managed by multiple users. Disabling the theme editor is a security measure that greatly reduces the risk of unauthorized access and potential coding errors that could compromise your site’s integrity.
Why Disabling the Theme Editor Matters:
- Prevents unauthorized access: Disabling the theme editor ensures that only authorized individuals with the necessary privileges can make changes to your website’s code, reducing the risk of malicious alterations;
- Mitigates coding errors: By limiting access to the theme editor, you minimize the chances of accidental coding mistakes that can result in site crashes or vulnerabilities;
- Enhances security: This feature is a crucial part of your overall security strategy, guarding against potential exploits that could be used by hackers to compromise your website.
A Step-by-Step Guide to Reviewing Security Plugin Settings
Identify the Plugin in Use: Before diving into the settings, it’s crucial to determine which security plugin is currently active on your WordPress website. Each plugin has its unique configuration interface and options, so identifying the correct one is the first step toward ensuring your site’s security.
For SiteGround Security Plugin Users:
- Navigate to the Plugin: Access the SiteGround Security plugin by following these steps:
- Go to your WordPress dashboard;
- Look for ‘SG Security’ in the menu and click on ‘Site Security.’;
- Disable Themes & Plugin Editor: If you suspect this setting is causing issues, locate and toggle off the option labeled ‘Disable Themes & Plugin Editor.’
- Save and Refresh: After making the change, be sure to save your settings, and then refresh your webpage to check if the issue has been resolved.
For iThemes Security Plugin Users:
- Access the Plugin: To review and adjust settings for the iThemes Security plugin, follow these steps:
- Navigate to ‘Security’ in your WordPress dashboard;
- Look for ‘Settings’ and click on ‘Advanced.’;
- Find the WordPress Tweaks Tab: In the ‘Advanced’ section, locate the ‘WordPress Tweaks’ tab;
- Disable File Editor: To re-enable the file editor, simply uncheck the ‘Disable File Editor’ option.
- Save and Refresh: After making the change, save your updated settings and refresh your webpage to ensure that the issue has been resolved.
For Users of Other Security Plugins:
If you’re using a different security plugin, the process might vary, but the overarching goal remains the same—ensuring that no security feature is inadvertently causing functionality issues on your site. Here are some general steps to follow:
- Access It: Log in to your WordPress dashboard and find the settings or configuration page for your security plugin;
- Examine All Relevant Settings: Thoroughly review all settings and options provided by the security plugin. Pay close attention to any options related to file editing, theme editing, or plugin management;
- Disable or Adjust as Needed: If you identify settings that could be impacting your site’s functionality, disable or adjust them as necessary;
- Save Changes and Test: Always save your changes and then test your website to ensure that the issue has been resolved. Be sure to check the specific functionality that was affected.
Step 3: Empowering Your WordPress Website – Update ‘wp.config.php’ File
Your WordPress website’s performance and functionality are crucial aspects that need constant attention. If you’ve encountered issues and need to make adjustments, one powerful solution is to update your ‘wp.config.php’ file directly. This step can potentially resolve various problems and enhance your site’s capabilities. Here’s a detailed guide on how to do it:
- Accessing ‘wp.config.php’:
- Log in to cPanel: Accessing your ‘wp.config.php’ file via cPanel is a standard method. Simply log in to your cPanel account and navigate to the file manager;
- Use the WP File Manager Plugin: Alternatively, consider using the WP File Manager plugin. This option is recommended, especially for those who may find accessing cPanel intimidating or challenging;
- Why Choose It:
- The plugin offers a user-friendly interface;
- It eliminates the need for technical expertise;
- Suitable for beginners and non-technical users;
- Making Changes:
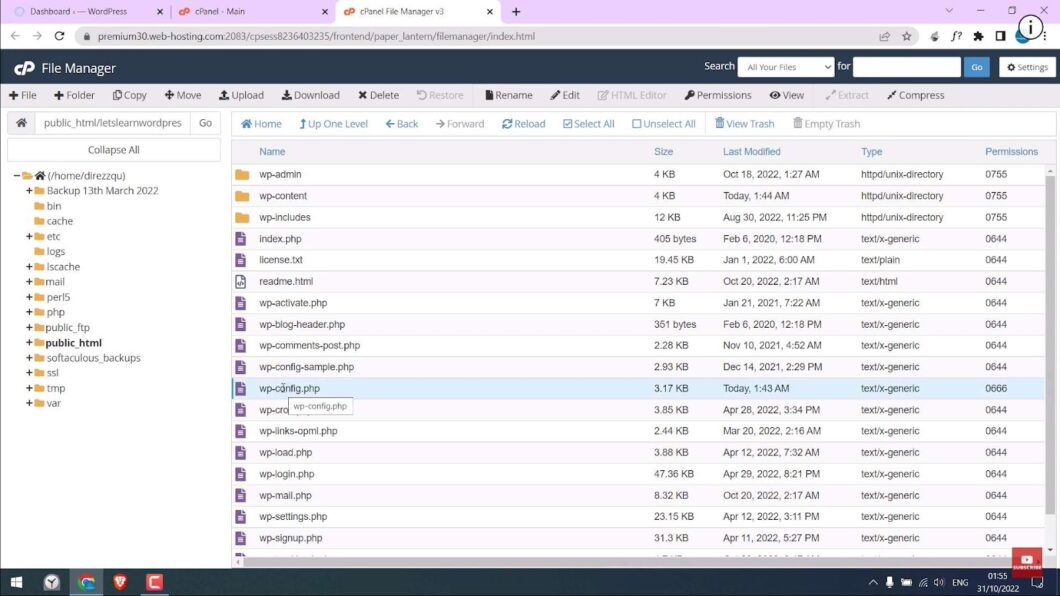
- Locate ‘wp.config.php’: Once you’re in the file manager or the WP File Manager plugin, navigate to the ‘wp.config.php’ file. This file is a pivotal part of your WordPress setup;
- Access Code Editor: Right-click on the ‘wp.config.php’ folder and select the ‘Code Editor’ option. This is where you’ll make the necessary changes;
- Edit ‘DISALLOW_FILE_EDIT’:
- Within the Code Editor field, search for the following line: define(‘DISALLOW_FILE_EDIT’, true);
- When you find it, simply change the value ‘true’ to ‘false’.
- Why Adjust ‘DISALLOW_FILE_EDIT’:
- By changing ‘DISALLOW_FILE_EDIT’ to ‘false,’ you enable the theme editor in WordPress;
- This is a critical step if you want to make direct changes to your theme files or troubleshoot issues within your theme.
- Save & Close: After making this crucial modification, click ‘Save & Close’ to apply the changes to your ‘wp.config.php’ file;
- The Result: After refreshing your WordPress admin panel, you’ll find that the theme editor is now enabled and available. This empowers you to make precise changes to your website’s theme, potentially resolving issues and enhancing your site’s appearance and functionality.
Step 4: Isolating the Problematic Plugin
If you’ve reached this step, it means you’ve encountered a situation where your WordPress theme editor or Widgets option has mysteriously disappeared. Fear not, for we’re about to delve into a comprehensive troubleshooting process to identify and resolve the issue. One common culprit? A rogue plugin that’s not playing nice with your theme. Let’s get started.
Deactivation of All Plugins – The Detective Work Begins
Access Your Plugins: Log in to your WordPress dashboard and navigate to the “Plugins” section. Here’s how to proceed:
- Hover over “Plugins” in the left-hand menu;
- Click on “Installed Plugins.”;
- Deactivate All Plugins: It’s time to hit the pause button on your plugins. Select the option to deactivate all of them. This step temporarily disables all your plugins without deleting any data or configurations. Your site may look a bit different during this phase, but it’s just temporary;
- Reload Your Dashboard: After deactivating all plugins, refresh your WordPress dashboard by navigating back to the home page.
Reactivating Plugins: A Careful Process
Now that you’ve given your website a breather, it’s time to reintroduce your plugins systematically. Here’s how:
- Start Reactivating: Begin reactivating your plugins one by one, starting with the first one on your list;
- Check the Theme Editor: After each activation, head over to the “Appearance” section of your WordPress dashboard. Specifically, look for the “Theme Editor” option. Is it back? If so, you’re on the right track!;
- Repeat and Identify: Continue this process for each plugin. If at any point you find the Theme Editor re-disappearing, you’ve likely identified the problematic plugin.
Crucial Note: Widgets May Share the Blame
Here’s an important tidbit: sometimes, a finicky plugin isn’t just responsible for the Theme Editor vanishing act but can also play hide-and-seek with your “Widgets” option under the “Appearance” menu.
What to Do Next – Options Galore
So, you’ve pinpointed the misbehaving plugin. What’s the next step? Here are your choices:
- Bid Farewell: If the plugin in question isn’t essential to your website’s functionality, consider parting ways with it. Delete the faulty plugin and live without its services;
- Hunt for a Replacement: No plugin is irreplaceable. Scout the WordPress plugin repository for an alternative that serves the same purpose and is more compatible with your setup;
- Seek Developer Support: If the plugin is crucial to your site and you can’t imagine life without it, reach out to the plugin’s development team. They might provide guidance, updates, or fixes to ensure smooth sailing;
- Read about the potential of PHP max input vars in WordPress for enhanced performance and efficiency. Discover key tips!
Conclusion
To resolve the issue of a missing WordPress theme editor, undertake these measures: Firstly, confirm the complete activation of your chosen theme. Then, fine-tune the configurations of your security plugin. Proceed to the ‘wp.config.php’ Code Editor and alter the ‘disallow file edit’ command. Lastly, deactivate each plugin and systematically reactivate them individually. We’re eager to hear about your experience with this process, so please share your progress in the comments section below!

")


